
|
|
There are two aspects of a motor the primary child needs to learn: how it works inside and how it works as part of a circuit. The primary coil motor pictured above does the first. The Snap
Circuit motor does the second.
The energy transformation is Electricity > Magnetism > Motion
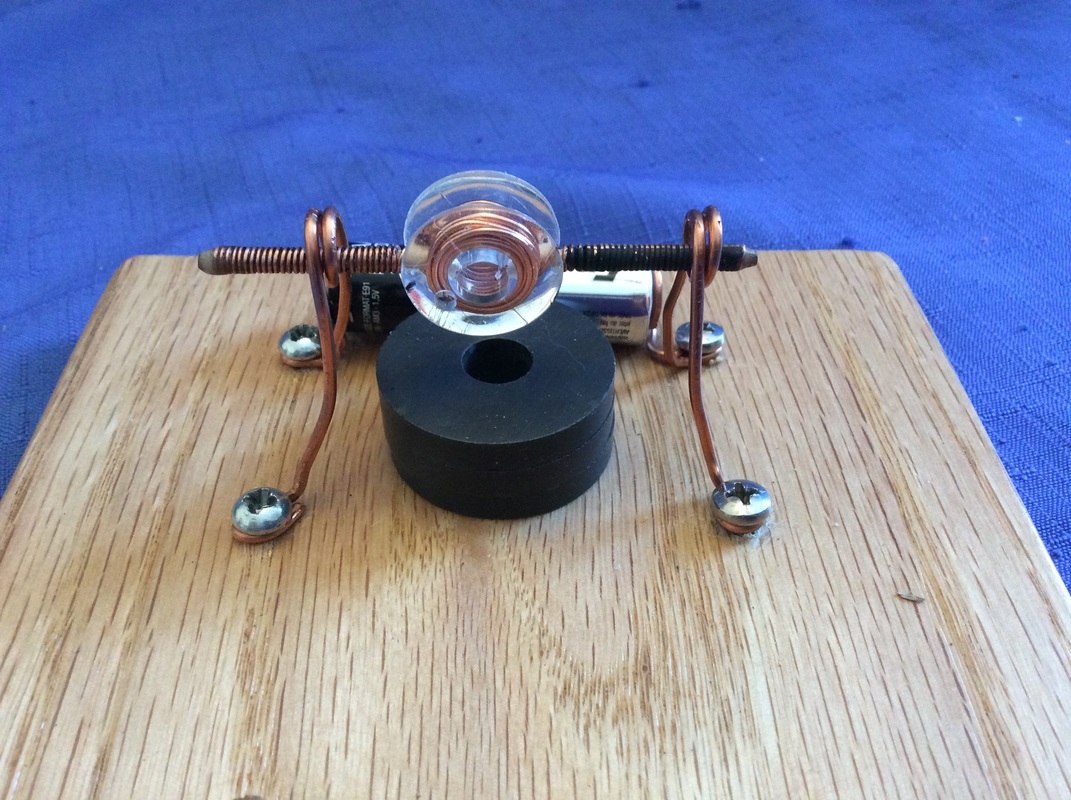
Most motors the child will encounter are basically metal cans with a shaft that spins when you connect the can to a battery. That gives you behavior in a circuit. The primary coil motor pictured above gives the child the minimal, simple components of an electric motor in a way that she can put together and take apart repeatedly.
Eventually the child will be able to actually wind the coil and bend the copper connectors as well, reproducing this motor, which is an excellent process for dexterity and tool use and a excellent maker space project. This is a motor a young child can assemble and an older child can actually make. You can readily see the basic materials of which it is made: wood, wire, screws, ceramic magnets and a battery and what to do with them. Cost of materials to produce four primary coil motors is about $20. The process of winding necessary to make a primary coil is an excellent non-electric Practical Life exercise that can take many forms in many materials. The act of bending the copper connectors with pliers is an open ended creative opportunity. The connector shape in the motor can be anything so long as it produces a closed circuit and a closed circuit is a fundamental electrical concept.
This type of motor is easy to find on the internet both as a DYI project and as a commercial product. The problem is how to make it viable for a primary classroom. Most examples use the wire of the coil as the supporting armature of the coil, which makes them very bendable and once bent the coil won't spin. This is not a self-correcting control of error. It is frustratingly too hard to do. This kind motor is uses very low power and requires stable balance and minimal friction, much like the static balance bird. A primary coil consists of a wooden dowel passing through a plastic bobbin with the coil of wire wrapping around the bobbin and then around the dowel on either side finished with epoxy at the ends. This gives you something tough enough for the child to handle. She can put it together and take it apart repeatedly so identifying the essential components of a motor: frame, connectors, coil, magnet, electricity.
This design puts the dowel, the armature, through the coil sideways and mounts it above the magnets, which is a demonstration of principle. Practical motor design places a number of coils inside the magnets and around the armature. The child needs to see this as well. The problem now is that the metal contacts, called bushings, that pass electricity to the coils are necessarily delicate, low friction components and so cannot be part of the assembly process in a classroom setting. That's also the reason that in practical use a motor has to be a tough, sealed metal can.
There a few commercially available examples of visible motors aimed at the elementary level that do provide the assembly of loading the magnets and battery. They are also tend to be visually distracting and obscure the fundamental connections between the elements. The advantage is you don't have to make them. Just buy them. Some assembly is required, batteries not included. Since the goal is to get visible motors in the classroom this is a viable approach.
Circuit motor does the second.
The energy transformation is Electricity > Magnetism > Motion
Most motors the child will encounter are basically metal cans with a shaft that spins when you connect the can to a battery. That gives you behavior in a circuit. The primary coil motor pictured above gives the child the minimal, simple components of an electric motor in a way that she can put together and take apart repeatedly.
Eventually the child will be able to actually wind the coil and bend the copper connectors as well, reproducing this motor, which is an excellent process for dexterity and tool use and a excellent maker space project. This is a motor a young child can assemble and an older child can actually make. You can readily see the basic materials of which it is made: wood, wire, screws, ceramic magnets and a battery and what to do with them. Cost of materials to produce four primary coil motors is about $20. The process of winding necessary to make a primary coil is an excellent non-electric Practical Life exercise that can take many forms in many materials. The act of bending the copper connectors with pliers is an open ended creative opportunity. The connector shape in the motor can be anything so long as it produces a closed circuit and a closed circuit is a fundamental electrical concept.
This type of motor is easy to find on the internet both as a DYI project and as a commercial product. The problem is how to make it viable for a primary classroom. Most examples use the wire of the coil as the supporting armature of the coil, which makes them very bendable and once bent the coil won't spin. This is not a self-correcting control of error. It is frustratingly too hard to do. This kind motor is uses very low power and requires stable balance and minimal friction, much like the static balance bird. A primary coil consists of a wooden dowel passing through a plastic bobbin with the coil of wire wrapping around the bobbin and then around the dowel on either side finished with epoxy at the ends. This gives you something tough enough for the child to handle. She can put it together and take it apart repeatedly so identifying the essential components of a motor: frame, connectors, coil, magnet, electricity.
This design puts the dowel, the armature, through the coil sideways and mounts it above the magnets, which is a demonstration of principle. Practical motor design places a number of coils inside the magnets and around the armature. The child needs to see this as well. The problem now is that the metal contacts, called bushings, that pass electricity to the coils are necessarily delicate, low friction components and so cannot be part of the assembly process in a classroom setting. That's also the reason that in practical use a motor has to be a tough, sealed metal can.
There a few commercially available examples of visible motors aimed at the elementary level that do provide the assembly of loading the magnets and battery. They are also tend to be visually distracting and obscure the fundamental connections between the elements. The advantage is you don't have to make them. Just buy them. Some assembly is required, batteries not included. Since the goal is to get visible motors in the classroom this is a viable approach.
|
|
|